You have 0 items in your cart

£1.00 excl. VAT
We believe we offer the widest range of Tongue and Groove Panelling and Cladding options available, cut to size, online. Our “standard” pitch (the distance from the bottom of one groove to the next) options include 75mm, 100mm, 150mm, and even a variable, random pitch option. If that does not suit your particular project, we can also provide bespoke, custom width, Tongue and Groove Cladding to suit your exact needs.
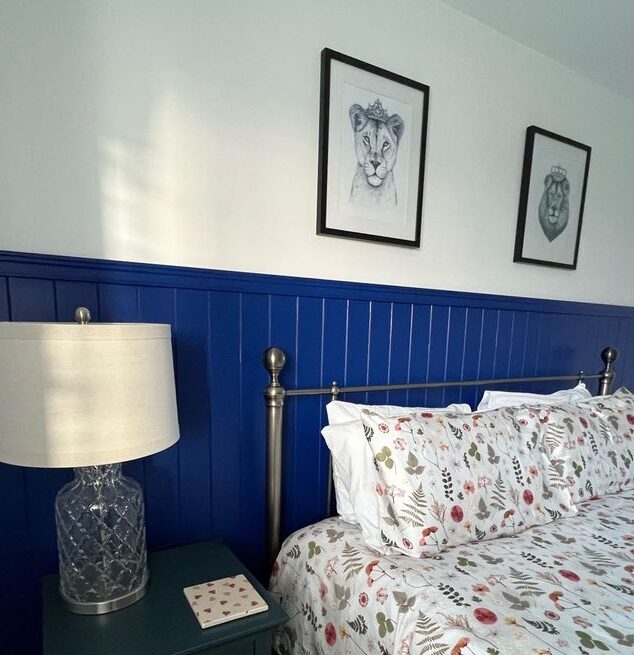
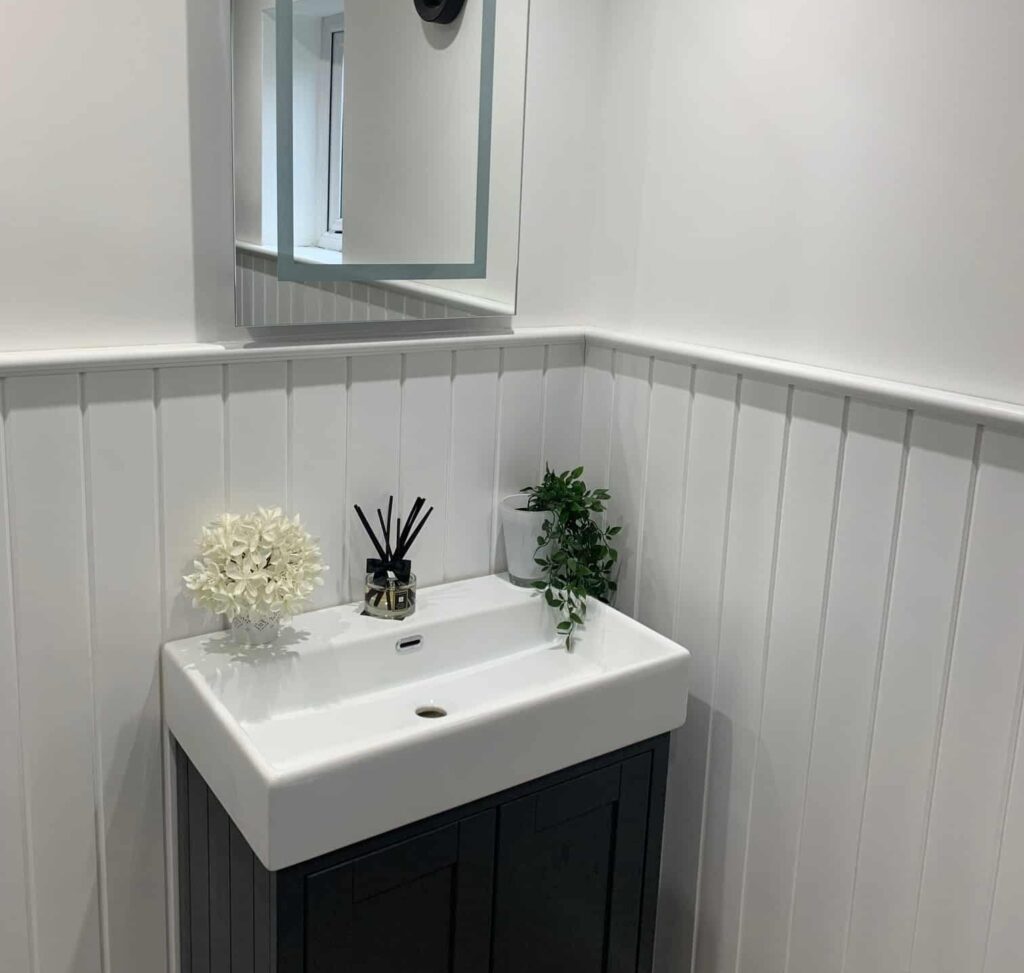
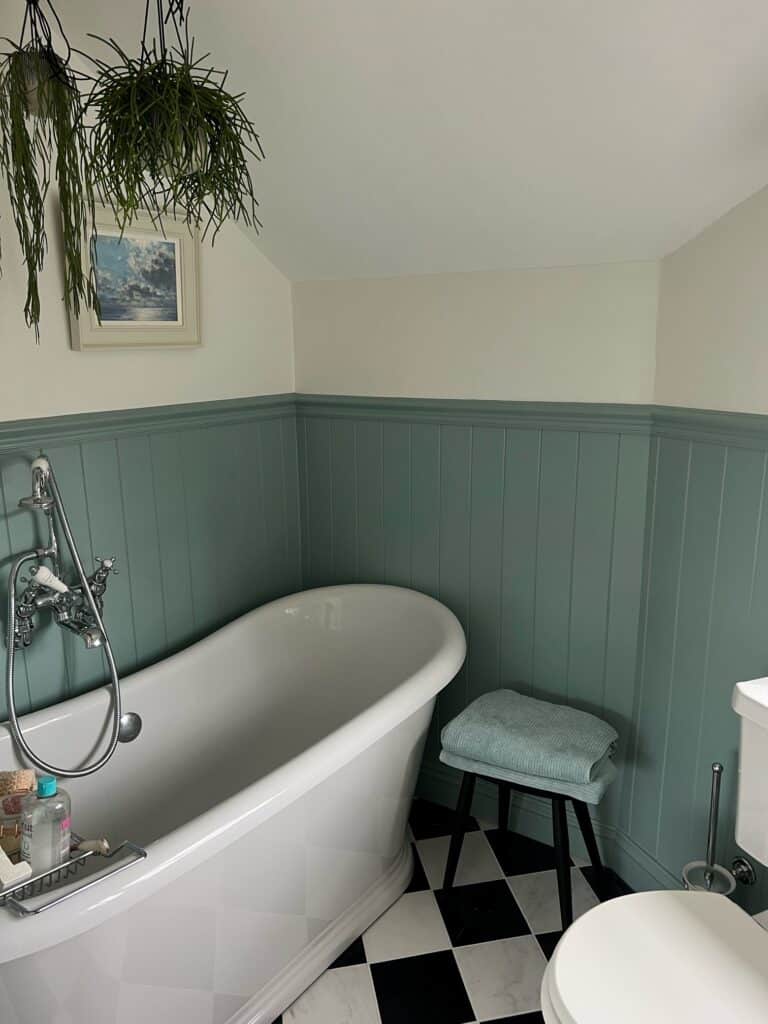
Each of our of T&G Cladding panels is CNC routed, in-house, using high quality Moisture resistant MDF. This makes it easier to paint and resistant to moisture (not water). This makes it the perfect choice for wall cladding projects in kitchens, bathrooms, boot rooms and utility rooms.
As well as offering a custom pitch option, our in-house, CNC Routing capabilities also allow us to produce Bespoke Tongue and Groove Cladding options including, but not limited to the following…
The following information is intended as a basic guide on How to Measure Tongue & Groove Wall Cladding for DIYers within a domestic environment. Please note that every wall and every situation is different so, and with this in mind, please free to adjust the measurement allowances, and advice provided below, to suit your own personal preferences and situation. We cannot accept any responsibility for incorrectly measured, or ordered, panels.
If you are fitting panelling to the full width of one wall, take three measurements to check the overall width of the wall, one from the bottom (skirting board level), one from the middle height of the panelling and one from the top of the proposed height of the panelling.
If all three measurement are the same, you’re in luck, simply remove 2-3mm either end to allow for caulking and order the panelling to this width and your desired height. We will cut the panels to width and ensure the joins fall within a groove for minimum joint lines.
In the likely event the measurements are different, use the smallest measurement, if you are happy to caulk the gaps either end, or take the longest measurement if you are happy to scribe in/shape to fit.
Measure your first wall, as described above however, you can remove around 2/3 to 3/4 of the panel thickness off the overall width of the panelling as it will be covered by the thickness of the next panel.
Example 1 – your first wall measures 3678mm and your panel thickness is 9mm. The calculation would be 3678mm minus 2mm for caulking minus 7mm (3/4 of the panel thickness) = 3669mm is the length of you first panel.
When measuring you second panel you will need to remove 2mm either end for caulking and the thickness of the panelling.
Example 2 – your second wall measures 4005mm and your panel thickness is 9mm. The calculation would be 4005mm minus 4mm for caulking (2 x 2mm) minus 9mm for the thickness of the panel = 3992mm
When measuring for three walls of cladding you can remove 3/4 of thickness of the panel from the second panel measurement. The third wall should be measured in the same way as shown in example 2 above.
When measuring for cladding on four walls the second a third walls should be measures as shown in Example 2, above. The fourth and final panel should be cut to fit between the first and third walls so 22mm will need to be removed from the overall length.
Example 3, your wall measures 4005mm minus 4mm (2 x caulk gap, one either end) minus 18mm (2 x panel thickness) = 3983mm
Naturally, at least one of the walls will have a door and architrave. We would recommend measuring from you corner and up to, and then from, the door frame to the corner allowing 2mm for caulking. You will also need to allow for the thickness of any panels and/or caulking in the previous or following corner.
When dealing with an external corner one panel will need to overhang whilst the other will but up again it. The overhang should be the thickness of the panel plus an allowance for the thickness of the adhesive sticking it to the wall.
The panels that buts up to the overhanging panel should be push tightly up against it so that there is no gap. You may want to run a bead of adhesive down the edge to glue the corner together, this will help prevent the joint from cracking.
To finish off your project we offer a choice of three Dado Rails for Tongue and Groove cladding, we even supply a shelf solution with a moulded edge to compliment the panelling and enhance your design.
If you would like to learn more about our standard, or bespoke, Tongue and Groove wall cladding options, please feel free to get in touch, we’d love to help you create the wall of your dreams.